 People have been stuffing animals into other animals since at least Julius Caesar’s time, and not in the “Tijuana donkey show” fashion, either. Although I’m pretty sure Caligula was into that, but that’s a different story and we’re not that kind of blog. I’m talking about the culinary tradition. The Romans had their traditions and later on, French charcutiers made galantines and terrines to entertain kings and other nobles. About 25-30 years ago, Chef Paul Prudhomme got credit for shining the public light on the modern take—turducken.
Most of you probably know what it is, but for those who don’t, it’s a chicken, stuffed into a duck, stuffed into a turkey. The chicken usually has Cajun stuffing in it and other types of stuffing are often used as mortar between the building blocks, as well. If you want to build one, you have to de-bone all three birds first, making sure not to cut the skin on the turkey while doing so. Or, you can have your butcher do that for you when you buy the birds. Once that’s done, you stuff them together, then use cooking twine to hold it all together as a cohesive unit, coat it with seasoning, and you’re ready to cook. Or you can do what I did.
There are several companies that make turkduckens that you can order online. They usually start at $55.00 but the overnight shipping runs the price up another $80. What you’re really paying for, though, is that most valuable of holiday commodities, time. All of the prep is done for you, leaving you only the work of thawing the beast in the fridge, heating the oven, and cooking it. You may be able to avoid the shipping cost by hunting at your local market. Chains like Bristol Farms have frozen turduckens like the one I used or you can order one online from sites like Cajun Grocer.
My turducken weighed 10 lbs and came with Cajun style pork sausage stuffing in it. All you have to do is thaw and cook the thing. Thawing takes 2-3 days in the refrigerator, after which it spends 4 hours in the oven. Provided, of course, you’re one of those people who obeys traffic laws and always follows the directions. If so, read no further.
For those of you with scars and memories of getting your tongue stuck to metal in winter, read on. People smoke turkeys all the time. Adding smoky flavor to a turducken seemed like a stand-out winner to me. It also gave me an excuse to throw something new in the smoker, and well, I think we all know how I feel about that.
It takes about 6 hours to smoke cook a 10 lb turducken to the recommended 165 degrees F for poultry. I put the turducken on a rack and set it on the top level inside the smoker to start with, using a water pan filled 3/4 full with hot water. As it cooks, drippings fall into the pan. You’ll want to save those for turducken gravy later on.
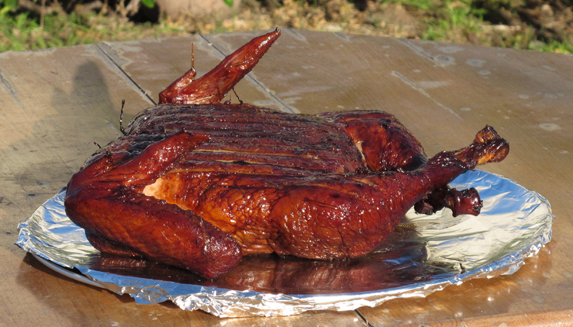
Every half hour, I added in a cup of apple wood chips that had soaked for 30 minutes in water. After the first three hours, I moved the bird down to the lower rack, then coated it in olive oil to help it stay moist. The water level had fallen off as well, so I added some more hot water to keep the steam going. Some people recommend covering the turducken in foil at this point, but it wasn’t dry at all so I didn’t. Six hours after I’d started, the beast was a rich brown, the meat thermometer clocked it at 165 degrees, and my back yard was filled with the aroma of poultry and apple smoke.
I let it sit in foil for a little while and removed the twine before carving it. Unlike a normal turkey with a breastbone, you don’t cut a turducken along the sides. You slice in cross sections between the wings and the legs. That way, each slice has all three birds and the stuffing in them. Smoking it adds another dimension to the flavor that made the turducken really stand out. Personally, I’m not a big fan of duck, but the apple wood made it taste great.
- 5 cups turducken stock with pan drippings
- 1 (10.75 ounce) can condensed cream of mushroom soup
- 1/2 teaspoon fresh crushed black pepper
- 1 teaspoon sea salt
- 1/4 teaspoon garlic powder
- 1 cup milk
- 1/3 cup all-purpose flour
- Bring the tuducken stock to a boil in a large saucepan.
- Stir in the soup, and add the pepper, salt, and garlic powder.
- Reduce heat to low, and let simmer.
- Warm the milk in the microwave, and whisk in the flour with a fork until there are no lumps.
- Return the gravy to a boil, and gradually stir in the milk mixture.
- Continue to cook, stirring constantly, for 1 minute, or until thickened. Be careful not to let the bottom scorch.
Latest posts by Mark Masker (see all)
- 2024 Scovie Awards Call for Entries - 07/07/2023
- 2024 Scovie Awards Early Bird Special: 3 Days Left - 06/29/2023
- 2024 Scovie Awards Early Bird Deadline Looms - 06/25/2023


