Many of us have idyllic dreams of being self reliant, living in contact with nature, producing natural, organic foods, and living free from an office setting—boss included. The Milpa could bring us closer to those dreams and that’s why we prepared a “how to” simple method—adapted to the US and Canada—to make a Milpa at home.

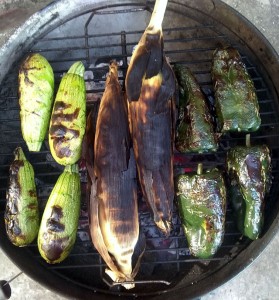
Grilled corn and poblanos
For the suburban citizen however, the Milpa can be the remedy for sedentary living, stress, or too much social networking and streaming TV. If physical space is limited, we have good news: one of the advantages of the Milpa is that it is a space saving practice, because several species share the space close to each other, and it can be done in rows or beds. The size and variety of species in our Milpa will depend on land, water, and labor available. Climate will be determinant, however.

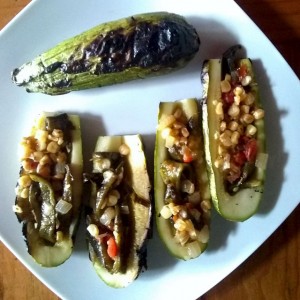
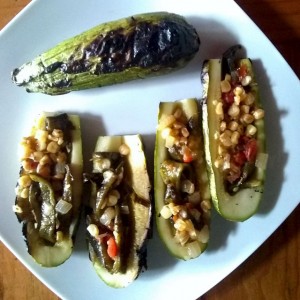
Grilled corn and poblano stuffed squash
You may substitute beans for chickpeas, green beans, peas or faba beans. Squash may be substituted for cucumbers, watermelons or cantaloupes; species that cover the ground producing the effect of mulching. After we finish this, we have our basic Milpa which we will dress using our creativity with other species.
Chiles are an excellent choice to complement our basic Milpa crops. Plant your favorite varieties of chiles in rows alternating with the cornrows. Rows of tomatoes, onions and garlic in between not only is a good idea, it’s highly recommended. Don’t we want to be able to make a salsa or pico de gallo from scratch at harvest time? Fine herbs and medicinal herbs can be planted in the perimeter, and perennial herbs can go on pots for when the winter arrives we can move them and protect them from the cold. This is not usually done in Central and South Mexico, but it’s a recommendation for our USA and Canada Milpa aficionados.
Something important we need to keep in mind is that the space or rows used for corn and beans one year needs to be used by other species the following year. We need to rotate the corn and beans around our Milpa to allow the beans to work the nitrogen fixation miracle in the whole area. Additionally, don’t overlook your seed supplier’s instructions as they are key to successful germination and growth. And finally, please compost. It’s good for the environment and especially for your project. The use of compost thus continues to be highly recommended. A gardening book? We never have enough books…
If you have had a garden you will find it easy and fun to do a Milpa. One year of having a Milpa will give you much knowledge and experience. You will develop the “feel” needed to provide your plants what they need; call it instinct. This will be your Milpa, your sustainable garden that will provide food, much pleasure, and pride. A space that bees will love to visit, and you will be proud to show your guests. All thanks to the Aztecs! Sunblock please…
Recipes

Grilling corn, squash, and poblanos
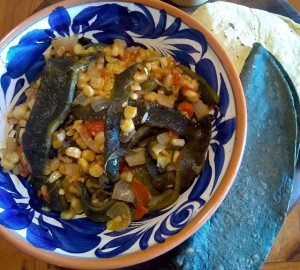
This dish was thought of as a stuffing but it can be served as a side dish or a main vegetarian course. Here are three suggestions for using it as stuffing. Your creativity is the limit. Enjoy a flavorful, nutritious and healthy meal!
Ingredients:
2 ears of corn grilled with leaves on and degrained
6 chiles poblanos grilled, cleaned, seeded. De-veined optional
8 squash grilled whole
1 tomato, chopped
½ onion, chopped
2 cloves garlic, minced
1 to 2 chile serrano, chopped optional
Salt to taste
Vegetable oil
Instructions:
Sautée the grains of corn with the poblanos in strips. Add the tomato, the onion, the garlic, the chile serrano, and the salt. Reserve the squash.

Grilled Calabacitas Stuffed with Corn and Poblano Strips
You may need two slices of Monterey Jack cheese if so desired.
Cut 4 squash into halves, remove the seeds, and fill with the stuffing. Add cheese (optional), heat and serve. Reserve leftovers.
Yield: 2 servings
Heat level: hot
Soft Vegetarian Tacos
You will need 6 corn or flour tortillas.
Chop the remaining four squash and mix with the stuffing leftovers.
On heated tortillas, add the stuffing hot and serve folded or rolled. These tacos will be good at any time of day or night. After making the tacos you still will have enough stuffing for an omelette!
Yield: two servings
Heat level: hot

Grilled Vegetable Omelette
You will need 4 beaten eggs and butter. Salt to taste. Two slices of Monterey Jack cheese optional.
On a buttered pan put the eggs and add a layer of the stuffing leftovers. After flipping the omelette add the cheese. Once the cheese is melted, roll or fold and serve. Enjoy!
Yield: two servings
Heat level: hot
Latest posts by José C. Marmolejo (see all)
- Unconventional Seafood Salsas - 04/25/2022
- Cocineras Tradicionales: The Traditional Cooks of Mexico - 04/01/2022
- Carnitas Calientes - 03/11/2022


